- Joined
- Oct 4, 2018
- Messages
- 12
- Reaction score
- 1
Hello everyone,
First off, I completely understand this is not a supported device of 3CX and help with this is greatly appreciated.
I am working on provisioning a SPA 112 for the purpose of connecting a fire alarm to it. The fire system requires 2 lines. The 3CX instance is CLOUD HOSTED.
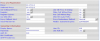
I have added the two extensions like normal into 3CX. I launched the Cisco configuration and entered in the:
. Proxy - 3CX Server IP
. User ID - Set to the extension number
. Auth ID - Set to the auth user
. Password - Set to the auth password
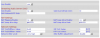
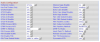
Set the following settings to:
. Network Jitter Level: very high
. Jitter Buffer Adjustment: no
. Call Waiting Serv: no
. Three Way Call Serv: no
. Preferred Codec: G711u
. Use Pref Codec Only: Yes
. FAX Passthru Method: ReINVITE
. Echo Canc Enable: no
. FAX Enable T38: yes
. FAX Tone Detect Mode: callee
. FAX T38 ECM Enable: yes
. Silence Supp Enable: no
The Dial Plan has not been modified from the default of:
(*xx|[3469]11|0|00|[2-9]xxxxxx|1xxx[2-9]xxxxxxS0|xxxxxxxxxxxx.)
I have loaded the latest version of firmware onto the device provided by Cisco. I have attempted to make connection but the device does not show up on the Phones page and on the device it shows the Registration State as failed.
I currently only have the 1 line enabled for right now, I will activate the second once the first is done. I am unable to obtain a provisioning template as the device is not support but after reading a dozen posts and articles, it seems like it's entirely possible to use this device. Unfortunately, it cannot be added as a FXS because of the lack of support.
Any ideas on what the problem may be and potential work arounds are extremely appreciated.
First off, I completely understand this is not a supported device of 3CX and help with this is greatly appreciated.
I am working on provisioning a SPA 112 for the purpose of connecting a fire alarm to it. The fire system requires 2 lines. The 3CX instance is CLOUD HOSTED.
I have added the two extensions like normal into 3CX. I launched the Cisco configuration and entered in the:
. Proxy - 3CX Server IP
. User ID - Set to the extension number
. Auth ID - Set to the auth user
. Password - Set to the auth password
Set the following settings to:
. Network Jitter Level: very high
. Jitter Buffer Adjustment: no
. Call Waiting Serv: no
. Three Way Call Serv: no
. Preferred Codec: G711u
. Use Pref Codec Only: Yes
. FAX Passthru Method: ReINVITE
. Echo Canc Enable: no
. FAX Enable T38: yes
. FAX Tone Detect Mode: callee
. FAX T38 ECM Enable: yes
. Silence Supp Enable: no
The Dial Plan has not been modified from the default of:
(*xx|[3469]11|0|00|[2-9]xxxxxx|1xxx[2-9]xxxxxxS0|xxxxxxxxxxxx.)
I have loaded the latest version of firmware onto the device provided by Cisco. I have attempted to make connection but the device does not show up on the Phones page and on the device it shows the Registration State as failed.
I currently only have the 1 line enabled for right now, I will activate the second once the first is done. I am unable to obtain a provisioning template as the device is not support but after reading a dozen posts and articles, it seems like it's entirely possible to use this device. Unfortunately, it cannot be added as a FXS because of the lack of support.
Any ideas on what the problem may be and potential work arounds are extremely appreciated.