


- Joined
- Jul 1, 2016
- Messages
- 6,672
- Reaction score
- 2,663
Last updated: 29/08/2024
This is more for the benefit of me. However, I thought people might like to install their 3CX's with the ISO rather then using the old command lines.
You will need:-
- 3CX ISO
- OVH VPS LE YOU MUST CHOOSE DEBIAN 10 DISTRO OR YOU'LL GET GRAPHICS ERROR
- VNC Viewer (Im using UltraVNC)
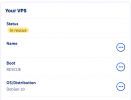
Buy your VPS from OVH then reboot it in rescue mode
Use the login details from the email or you can grab them from the login screen on the KVM.
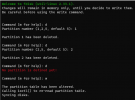
SSH to the VPS using Terminal/Powershell
For v18
For v20

For v20

Note: Any trouble with QEMU then kill it off and start it again.
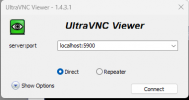
Once logged in, connect to the machine with VNC Viewer using localhost:5900 as the address.
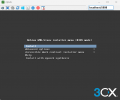
You may get disconnected off the VNC, just connect back up again and run through set up.
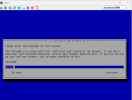
The server will reboot and the VNC will get disconnected. Give it a few minutes and connect back up with VNC.
If you cannot get connected with VNC then reboot the VPS in normal mode and continue the set up via OVH KVM (typically happens with v20 on LE VPS)
Once to get to here, select option 1 and reboot the VPS in to normal mode.
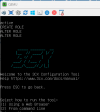
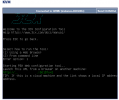
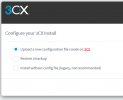
Finish off set up.
This is more for the benefit of me. However, I thought people might like to install their 3CX's with the ISO rather then using the old command lines.
You will need:-
- 3CX ISO
- OVH VPS LE YOU MUST CHOOSE DEBIAN 10 DISTRO OR YOU'LL GET GRAPHICS ERROR
- VNC Viewer (Im using UltraVNC)
Buy your VPS from OVH then reboot it in rescue mode
Use the login details from the email or you can grab them from the login screen on the KVM.
SSH to the VPS using Terminal/Powershell
Code:
ssh root@<IP> -L 5900:localhost:5900Unmount and delete all partitions on HDD
note you may have more/less partitions to delete
Code:
umount /dev/sdb1
fdisk -u /dev/sdb
d
d
w
Install KVM & download 3CX ISO
Code:
sudo apt-get clean all
sudo apt-get update
apt install qemu-kvm
Code:
wget -P /dev https://downloads-global.3cx.com/downloads/debian10iso/debian-amd64-netinst-3cx.iso
Code:
wget -P /dev https://downloads-global.3cx.com/downloads/debian12iso/debian-amd64-netinst-3cx.isoStart up the KVM
For v18
Code:
qemu-system-x86_64 -netdev type=user,id=mynet0 -device virtio-net-pci,netdev=mynet0 -m 1024 -enable-kvm -drive index=0,media=disk,if=virtio,file=/dev/sdb -vga qxl -vnc 127.0.0.1:0 -daemonize -cdrom /dev/debian-amd64-netinst-3cx.iso -boot once=dFor v20
Code:
qemu-system-x86_64 -netdev type=user,id=mynet0 -device virtio-net-pci,netdev=mynet0 -m 1024 -enable-kvm -drive index=0,media=disk,if=virtio,file=/dev/sdb -vga qxl -vnc 127.0.0.1:0 -daemonize -cdrom /dev/debian-amd64-netinst-3cx.iso -boot once=dNote: Any trouble with QEMU then kill it off and start it again.
Code:
pkill qemuConnect to KVM with VNC Viewer
Once logged in, connect to the machine with VNC Viewer using localhost:5900 as the address.
Run through the set up
You may get disconnected off the VNC, just connect back up again and run through set up.
The server will reboot and the VNC will get disconnected. Give it a few minutes and connect back up with VNC.
If you cannot get connected with VNC then reboot the VPS in normal mode and continue the set up via OVH KVM (typically happens with v20 on LE VPS)
Once to get to here, select option 1 and reboot the VPS in to normal mode.
Finish off set up.
Last edited:


