Yealink Phone Provisioning Problem After Switch to Hosted

Status
Not open for further replies.

Frank86

Bronze Partner
Joined
Jan 18, 2018
Messages
300
Reaction score
26
We switched 3CX 18 to hosted by 3CX. The migration of the PBX was flawless. We had an issue with a small subset of our Yealink desk phones, however.
After the switch, we factory-reset them and re-provisioned them with the SBC. Most of them came up quickly and without any problems. A few, however, would not take the assignment to the user. They stay in bold under the phones tab. They were working just fine for those users before the migration to hosted, but after the migration, we simply could not re-assign them to the users. We had a few spare desk phones (same models, Yealink T48S and T58A), and those were assigned to the uses without any problems, but their original ones could not, no matter how many times we factory-reset them and tried to assign them to the users.

Something like this never happened before. We we always able to factory-reset a phone and assign it to a user. And we also could for most of the phones this time. It was just a subset of phones that wouldn't work.

Any suggestions on how to address the problem?
 
Thank you for the suggestion. I checked the firmware, and it's the same for both phones that work and phones that don't.
Also, 3CX did not report any firmware update warning for any of the phones before the migration to cloud.
 
You could try defaulting the phones then log into the phone and paste in the provisioning url in the auto provisioning section of the phone. Confirm and then do provision now. Its helped me a time or 2. Other times I had to manually put in account credentials along with provisioning url to get them to come up. Hope this helps
 
Pasting the provisioning URL in the auto-provisioning section of the phone does not seem to help either, with or without credentials. I reset a phone to factory settings a few times and tried the above, but it did not take it.
 
The phone itself has a log of sorts in the phone - I would check that.
As well, the URL you are pasting into the phones that don't work - does that URL work from a PC on the same IP (so static a PC to the phones IP (turn the phone off) and try hitting that URL with the mac.cfg at the end)? Perhaps something is blocking access to the provisioning file (firewall, network monitoring, or banned IP)
 
  • Like
Reactions: JohnS_3CX
Hi Frank

- Ensure the SBC is up and running first and foremost - this affects the provisioning file content
- Ensure the old PBX is not also running in the background, after the migration it must be shut down permanently
- Check the phones have not been blacklisted
- Reject the bold entry in the phones page
- Delete the phone from the extension and factory reset it
- Make sure it is running the firmware found here specifically and not some other version
- Ensure the phone has internet access (I know it sounds silly but sometimes...)
- Make sure the network does not have DHCP option 66 leftover from before
- Also make sure you don't have any split DNS entries redirecting your FQDN to an internal office IP leftover from before

When the above is done, the phone should appear as new again in the phones page - don't assign it yet though.

  1. At this point, just copy the MAC, then open your webclient as a system owner extension.
  2. Click the Admin panel on the bottom left of the webclient, and go to users
  3. Edit your user and add an IP phone from there (important - don't do it via the management console)
  4. When asked pick the Outside The Office option, and select Normal phone
  5. Select the correct model and paste the mac, make sure you select the correct SBC from the drop down menu too
  6. Press Add phone to complete the procedure

This will create an entry in the Yealink RPS, and you can now reset your phone again so it can find that entry and auto-provision itself.

I know it's few things that need to be checked here, but let us know if this works for you.
 
Thank you. I'll check and report back.
 
Hi Frank

- Ensure the SBC is up and running first and foremost - this affects the provisioning file content
- Ensure the old PBX is not also running in the background, after the migration it must be shut down permanently
- Check the phones have not been blacklisted
- Reject the bold entry in the phones page
- Delete the phone from the extension and factory reset it
- Make sure it is running the firmware found here specifically and not some other version
- Ensure the phone has internet access (I know it sounds silly but sometimes...)
- Make sure the network does not have DHCP option 66 leftover from before
- Also make sure you don't have any split DNS entries redirecting your FQDN to an internal office IP leftover from before

When the above is done, the phone should appear as new again in the phones page - don't assign it yet though.

  1. At this point, just copy the MAC, then open your webclient as a system owner extension.
  2. Click the Admin panel on the bottom left of the webclient, and go to users
  3. Edit your user and add an IP phone from there (important - don't do it via the management console)
  4. When asked pick the Outside The Office option, and select Normal phone
  5. Select the correct model and paste the mac, make sure you select the correct SBC from the drop down menu too
  6. Press Add phone to complete the procedure

This will create an entry in the Yealink RPS, and you can now reset your phone again so it can find that entry and auto-provision itself.

I know it's few things that need to be checked here, but let us know if this works for you.
John,
Question:
How do I confirm the phones have not been blacklisted? Do you mean the IP address of the phones?
 
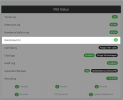
In the 3CX management console you will see the public IP behind which the phone resides.

Click here:
1683805970261.png
 
  • Like
Reactions: JohnS_3CX
Status
Not open for further replies.

Forum statistics

Threads
111,974
Messages
590,081
Members
164,899
Latest member
mazet