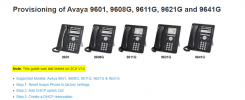
I set-up our Avaya phones using DHCP and HTTP, using a seperate HTTP server for the Avaya phones.
This set-up workes for all Avaya phones that are or can be updated to SIP.
1. Change DHCP Option 242 string on your DHCP server.
HTTPDIR=/HTTPPORT=80,HTTPSRVR= XXX.XXX.XXX.XXX(YOUR HTTP SERVER),SIG=2
2. Download firmware for Avaya phones and put on HTTP server
S96x1_SALBR7_1_1_0r9_V4r83.tar
SET RFSNAME S96x1_UKR_V38r3583_V38r3583.tar
3. On HTTP server create 96x1Supgrade.txt 46xxxsetting.txt
96x1Supgrade.txt
SET APPNAME S96x1_SALBR7_1_1_0r9_V4r83.tar
SET RFSNAME S96x1_UKR_V38r3583_V38r3583.tar
GET 46xxsettings.txt
46xxsettings.txt
## This is the webserver you tell the phone to download the 46xxsettings file from in the future
SET HTTPSRVR XXX.XXX.XXX.XXX (YOUR HTTP SERVER)
## HTTP port on the above server
SET HTTPPORT 80
## Test VLAN
SET VLANTEST 1
## Makes the phone auto login after reboot
SET QKLOGINSTAT 1
## SET PHNDPLENGTH
## International access code
## For the United States, the value is 011.
SET PHNIC 011
## Outside line access number
## SET PHNOL 1
## Rest of the dialplan settings
SET DIALPLAN "[3-7]xxx|1xxxxxxxxxx|911" (YOUR DIAL PLAN, YOU WILL NEED TO SET AS NEEDED)
SET PHNMOREEMERGNUMS "911" (OPTIONAL IS YOU WANT THIS ON SOFT-KEYS)
SET PHNEMERGNUM "911"
## SET BACKGROUND_IMAGE_Saver.jpg (YOU CAN CREATE AND SET OR LEAVE BLANK)
## SET SCREENSAVER_Saver.jpg
## These settings just lock down the menus on the phone - The settings below give you full-blown access
SET APPSTAT 1
SET OPSTAT 111
SET PROCSTAT 0
SET PROCPSWD 27238
SET PHY1STAT 1
SET PHY2STAT 1
SET LANG0STAT 1
SET SCREENSAVERON 15
SET GUESTLOGINSTAT 0
SET SPEAKERSTAT "2"
## This setting must be left at 0 otherwise the phone logs itself out after 10 mins
SET ENABLE_AVAYA_ENVIRONMENT 0
## Re-register Timer in seconds
SET REGISTERWAIT "300"
## Sip domains using IP address
SET SIPDOMAIN "000.000.000.000" (3CX SERVER)
SET SIPPROXYSRVR "000.000.000.000" (3CX SERVER)
SET SIPPORT "5060"
## 0 sets it to UDP, 1 sets to TCP, 2 sets to TLS
SET SIPSIGNAL 1
## This field re-affirms what is above but it is needed otherwise you'll get a message saying can’t connect to call server
SET SIP_CONTROLLER_LIST 000.000.000.000:5060;transport=tcp (3CX SERVER)
## Time & Date settings (THIS IS THE SETTING OF US-EST/EDT)
SET SNTPSRVR "us.pool.ntp.org"
SET DSTOFFSET "1"
SET DSTSTART "2SunMar2L"
SET DSTSTOP "1SunNov2L"
SET GMTOFFSET "-5:00"
SET SYSTEM_LANGUAGE Mlf_English.xml
SET COUNTRY "US"
SET DATEFORMAT %m/%d/%y
SET TIMEFORMAT 2
SET DAYLIGHT_SAVING_SETTING_MODE 0
# More full-blown menu settings
## SET CALLFWDSTAT "1"
SET ENABLE_SIP_USER_ID 0
SET CNGLABEL 1.
SET PROVIDE_OPTIONS_SCREEN 1
SET PROVIDE_NETWORKINFO_SCREEN 1
SET PROVIDE_LOGOUT 1
SET ENABLE_CALL_LOG 1
SET ENABLE_REDIAL 1
SET ENABLE_REDIAL_LIST 1
SET ENABLE_CONTACTS 1
SET ENABLE_MODIFY_CONTACTS 1
SET ENABLE_MULTIPLE_CONTACT_WARNING 1
PROVIDE_EDITED_DIALING 3
SET PUSHCAP 12222
# Sets Codecs
SET ENABLE_G711A 1
SET ENABLE_G711U 1
SET ENABLE_G726 1
SET G726_PAYLOAD_TYPE 110
SET ENABLE_G722 0
# Enable caller ID - Name & number
SET DISPLAY_NAME_NUMBER 3
# DISPLAY_NAME_NUMBER specifies whether the name and/or number will be displayed for
## incoming calls, and if both are displayed, the order in which they are displayed.
## Value Operation
## 0: display calling party name only
## 1: display calling party name followed by calling party number
## 2: display calling party number only
## 3: display calling party number followed by calling party name
# Voicemail settings button
SET PSTN_VM_NUM "5001"
SET MSGNUM 5001
# MWI indicator server - Point this at the 3CX server
SET MWISRVR "000.000.000.000" (SET TO 3CX SERVER)
4. On the Avaya desk phone, boot-up, use CRAFT to for admin
CLEAR
5. On the Avaya desk phone, boot-up, use CRAFT to for admin
SIG=SIP
REBOOT
6. Phone will go through a few cycles to download new firmware and flash the firmware; this takes about 15 mintues. After it loads, the phone will deliver to your
USERNAME=
PASSWORD =
If phone does not work. Use menu, arrow down to "About Avaya", verify firmware is R7_1_1
If not, you may need to sequentially update your firmware.
These instructions work for all Avaya 96XX phones.