



A simple step-by-step guide for phone template customization.
An API is a great way to automate things - but if you want a simple customization route, then custom phone templates are a tried-and-tested vehicle.
You can create a custom template which will not be overwritten and can be self-maintained. It requires some know-how of the provisioning parameters of the IP Phones you wish to work with (in this case Yealink).
You will make a copy of the template and then apply it when configuring the phone; this separate template will not be overwritten. We've updated our guide to get you started. Here's a recap.
Customizing settings on Yealink phones through a custom phone template
This document will show a quick run through customizing 2 settings on Yealink phones through a custom phone template, using the instructions in the configuration guide entitled Creating Custom IP Phone Templates. The target phone model for this example is the Yealink T48S, but the customizations will apply to all the phone models listed in the template.
For this example, you will work on the backlight intensity for the phone's display:
- the backlight intensity for when the phone is active; this is controlled by the phone_setting.active_backlight_level parameter
- the backlight intensity for when the phone is idle; this is controlled by the phone_setting.inactive_backlight_level parameter
Step 1: Create a custom phone template from the base template
You can follow the instructions under Duplicate A Base Phone Template here to create your custom template. For easy identification later on, you can use filename yealinkT4x_backlight when creating a copy of the template.
Step 2: Make your custom changes
Go to your Admin Console and:
- Navigate to "Admin → Advanced → Templates"
- Select "yealinkT4x_backlight.ph.xml" from the drop-down
- Click inside the text edit area for the template
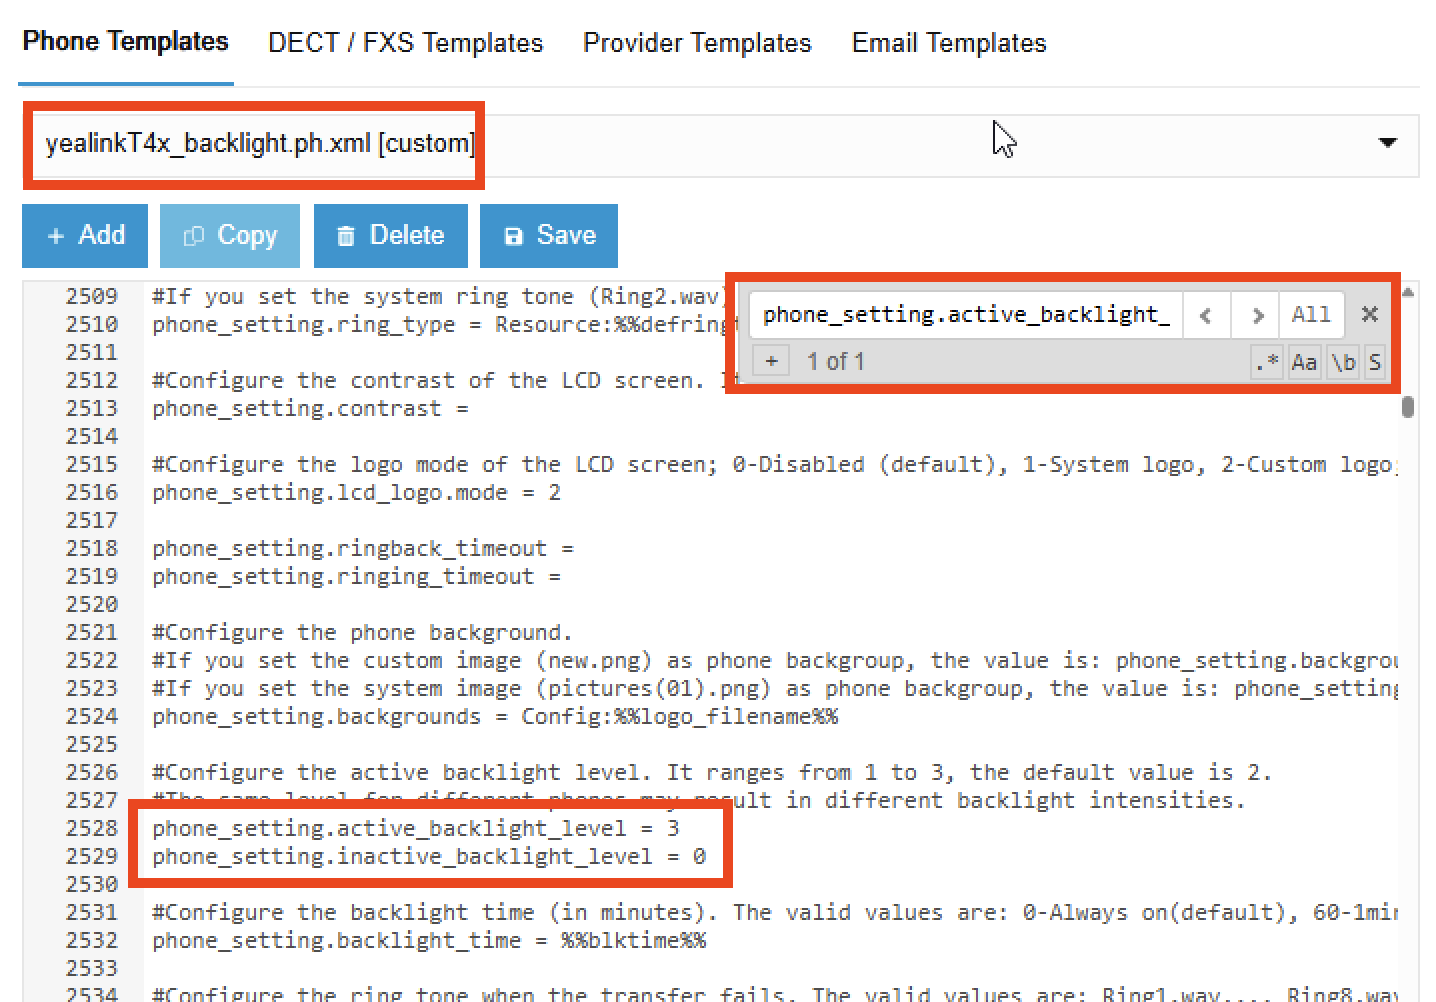
- Press CTRL+F to search for phone_setting.active_backlight_level
- Adjust the values as follows:
- phone_setting.active_backlight_level = 3 (to reduce the backlight level when the phone is active)
- phone_setting.inactive_backlight_level = 0 (to turn the display off when the phone is idle)
- Click the Save button
Step 3: Assign the custom template to your phone
Go to your Admin Console and:
- Navigate to "Admin Console → Users"
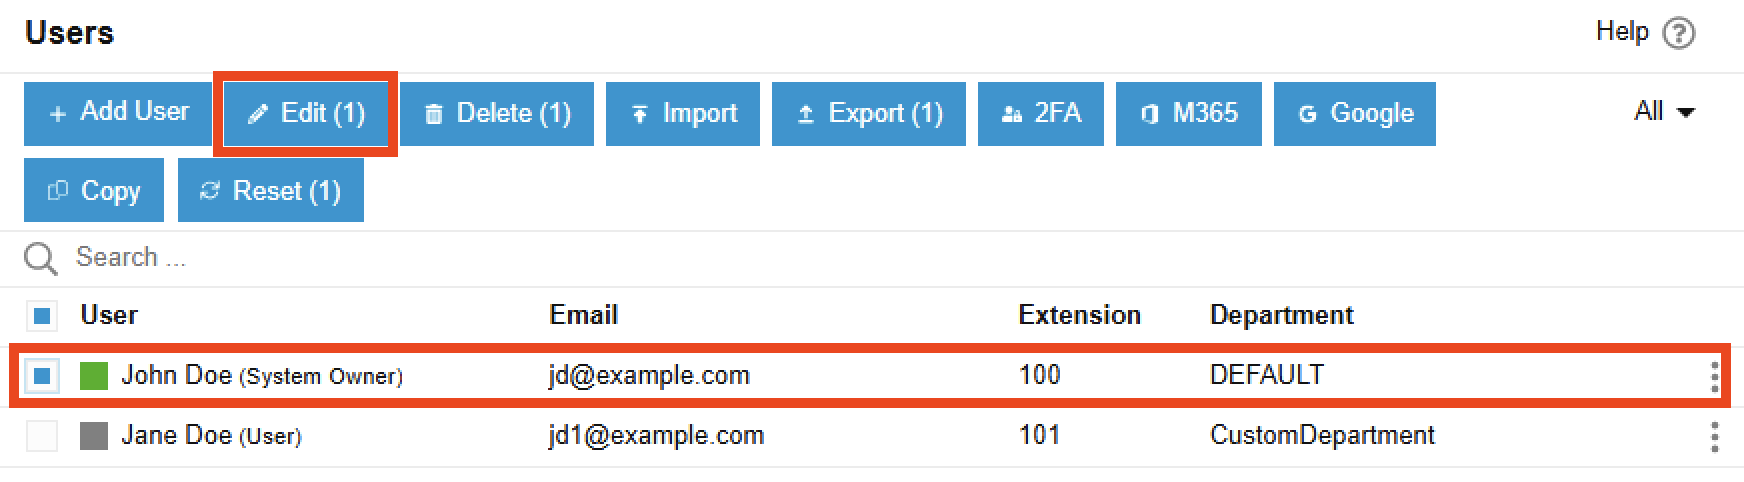
- Select the checkbox next to your user and click the Edit button
- Select the IP Phone tab and click the Configure a Phone button
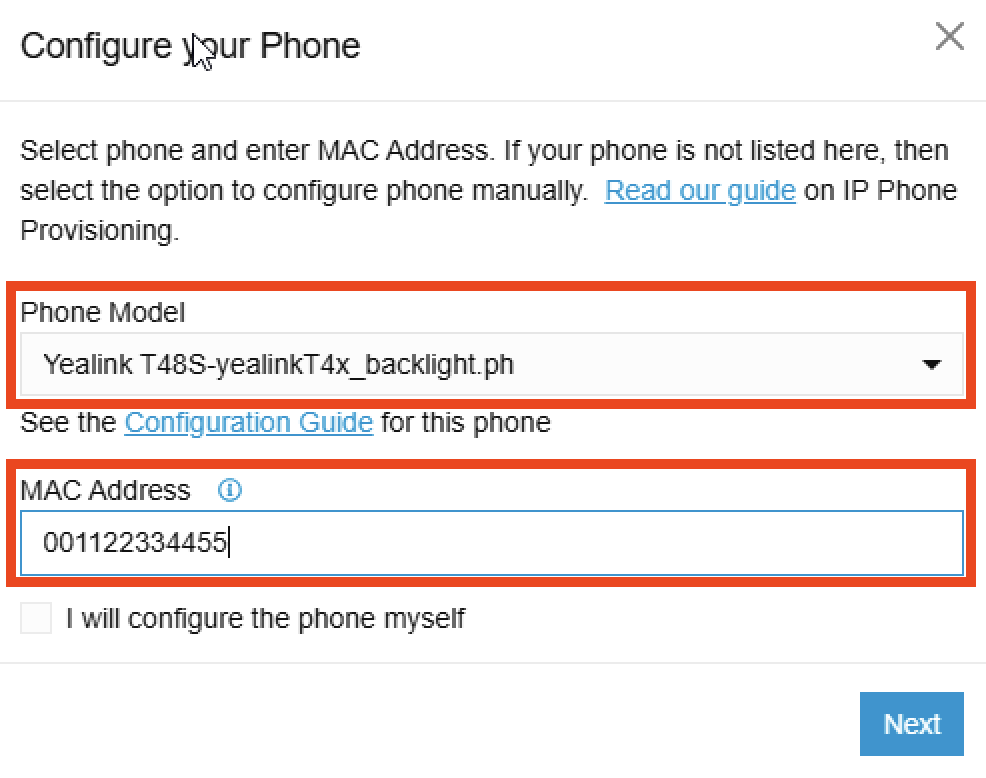
- Select your custom template in the Phone Model drop-down
- Insert the MAC Address for your IP Phone in the MAC Address field
- Click the Next button
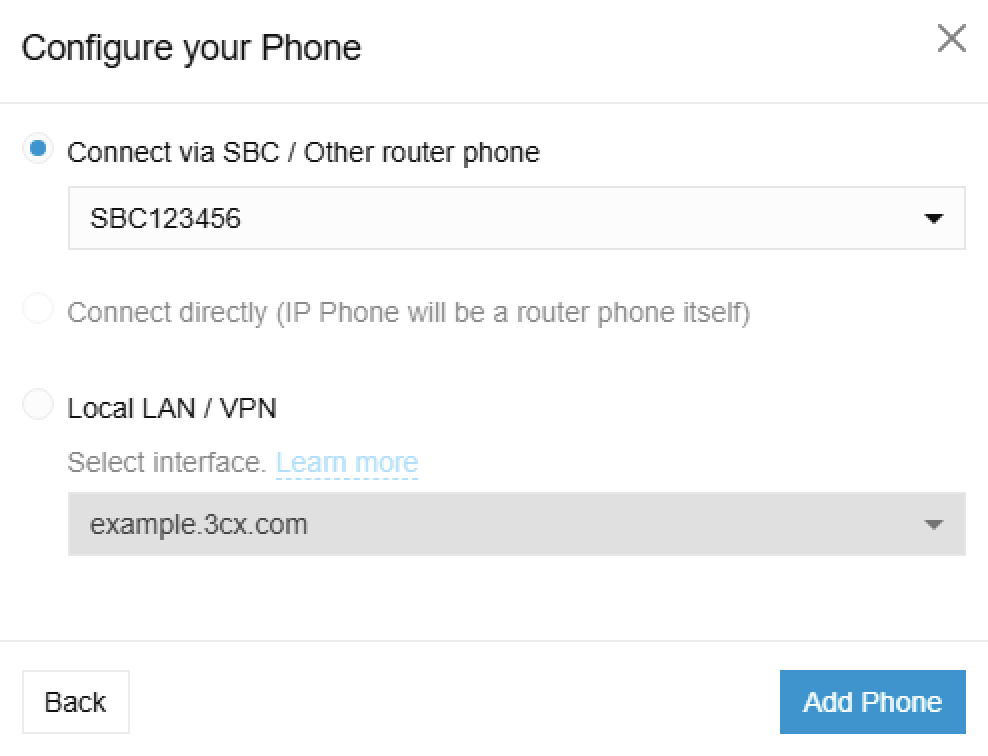
- Select the correct connection type for your IP Phone in the Configure your Phone dialog
- Click the Add Phone button, and click the Close button in the IP Phone Added dialog
- Restart your IP Phone:
- The safest option is to factory reset your IP Phone
- The phone will reboot and reprovision with the new custom settings
Join the discussion
Let’s discuss it in our dedicated Partner or Customer Forums. Follow us on X and LinkedIn to stay-up-to date on latest news and feature releases.









 Copyright © 2026