


3CX Dedicated users can now take full advantage of all the live chat improvements that were released with StartUP. We’ve revamped the plugin code, making it more compact, for greater speed and usability.
Benefits of the new live chat
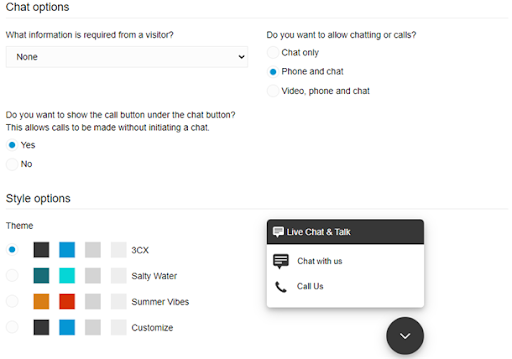
- Much more compact live chat bubble resulting in faster website loading time.
- No need to use the old HTML code generator making live chat config easy for anyone to understand.
- Configuration and customization carried out directly from the Web Client/Management Console.
- Any changes made are immediately updated on your website. No need to re-publish the settings.
- Simplified WordPress website configuration with a single URL to be pasted into the plugin.
- More live chat bubble options including colors, texts, and shapes.
- Upcoming in Update 5 many more visual improvements & features bringing it on a par with other solutions out there that charge in excess of $20 per person/per month.
Do I need to do anything?
Yes. If you are using 3CX Live Chat, the new setup won’t work with Live Chat plugin versions 10.0.3 and below. Live chat installations need to be updated to 10.0.4 and re-configured. Old live chat configurations in the PBX will be retained under the "Messaging > Facebook & SMS" section, to allow admins the time to migrate and copy settings if required.
How to update if using WordPress
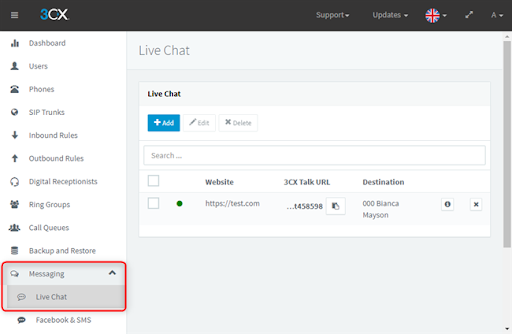
- Login to your Management Console and go to "Messaging > Live Chat > Add".
- Specify your website's URL and the destination you are using to route chats and calls.
- Customize your live chat box and click "Next". (You can always come back to customize your chat box at any time).
- Copy your 3CX Talk URL.
- Login to your website and update your 3CX Live chat plugin to 10.0.4+.
- Replace the 3CX Talk URL with the new one.
- Once your configuration is set, you will have to delete the previous installations from the PBX (Messaging > Facebook & SMS) to avoid any conflicts.
For other CMS Systems
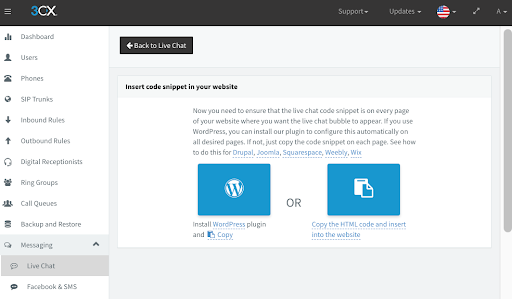
The same procedure needs to be followed to update your live chat on a non-WordPress website. Just follow steps 1 to 3 above and:
- Copy the HTML code
- Login to your website and replace the code with the new one.
- Navigate back to "Management Console > Facebook & SMS" and delete the old live chat configuration to avoid conflicts.
See our guides for adding live chat to other popular CMS systems.









 Copyright © 2026